[embedit snippet=”gas-ar-td-minimalist”]
The Frugal Fly Box
A Low Cost Double Decker DIY Fly Box Build
The Double Decker DIY Fly Box project came about not so much because of the money, but because of the inability to find a pre made fly box of the size, quality and configuration that I was looking for. Basically, I wanted to reduce the number of my many little fly boxes down to one single package BUT (big but) I wanted that package to be as compact and efficient as possible. So with that in mind I began my search ……. unsuccessfully. 🙁
There were a lot of decent size fly boxes out there but most did not take advantage of their size. It was frustrating as I really don’t understand the logic behind a three inch plus deep fly box with only one layer. Sure the deeper box has more “volume” but the actual usable “fly holding” real estate is still limited to the length and width regardless of how deep it is. Flies, especially chironomids, are just not that bulky so it seemed obvious that the fly holding capacity of a box that big could easily be doubled with the addition of a layer … which brought me to plan B … refocus my search on double layered fly boxes.
In the interest of keeping this post to a decent length, and focused on the topic, I’m not going to go into the frustration I endured trying to find the pre made, and reasonably priced, double decker fly box that I was looking for. Suffice to say, it was time for plan C … a DIY fly box, custom built, reasonably sized & priced (OK frugal), double decker home for my fly patterns.
DIY Fly Box Build | Here’s what you’ll need …….
DIY Fly Box Build | Materials …….
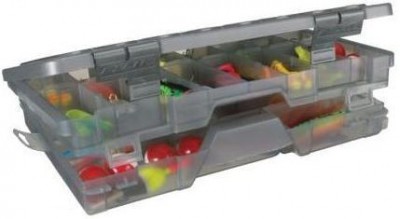
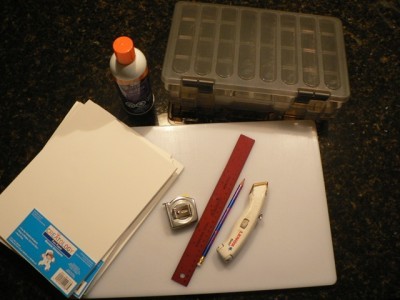
One Double Decker box of the size and quality that you require. I went with the Plano 4700 Guide Series Stowaway. The 4700 is a double decker box measuring approximately 14″ long x 9″ wide x 2.75″ deep – perfect for what I was looking for and a wopping $9.99 at Canadian Tire!The only problem was that it is full of a bunch of little compartments … don’t worry we’ll deal with those a bit later. 😉
 Four sheets of high density foam. I found the perfect stuff at Michaels – 9″ x 12″ sheets for $0.99 each!
One can of Spray on Adhesive. I don’t really think it matters which brand you use but for what it’s worth we went with Elmers Acid Free Craft Bond – $5.99 at Walmart.
[embedit snippet=”gas-auto-responsive-link-ad-minimalist”]
DIY Fly Box Build | Tools …….
- Dremel with a cutting bit
- Cutting Board
- Straight Edge
- Razor Knife
- Measuring Tape
- Pencil
- Hearing Protection
- Safety Glasses
- Disposable Rubber Gloves
DIY Fly Box Build | The Build …….
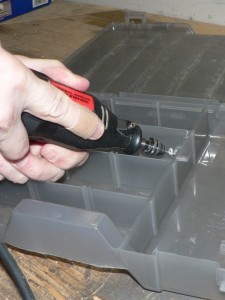 The easy part is over … time to get your hands dirty.
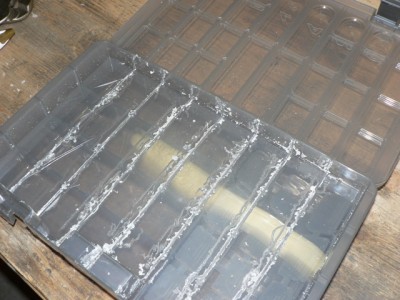
Step one is to deal with all those little compartments that we talked about earlier. I used a Dremel with a cutting bit to remove them all.
*Dremel tools are quite loud and there will definitely be small pieces of plastic being whipped through the air as you are cutting so before you start anything be sure to don your safety eye wear and hearing protection!
[embedit snippet=”gas-auto-responsive-link-ad-minimalist”]
Taking your time, carefully cut away all of the dividers inside both layers of the box. You’re done when both sections of the box are fully open and empty. It should look something very similar to this:
Don’t worry too much about how messy it looks as everything will eventually be covered by the foam. 😉
[embedit snippet=”gas-auto-responsive-link-ad-minimalist”]
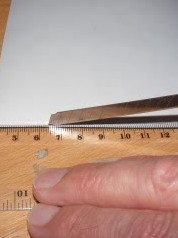 The next step is to measure and cut the four pieces of foam to fit the four surface areas in the box. It is important that you take the time to do this step as neatly as possible as the better the job you do here, the better the look and function of the finished product. Measure twice, mark your cuts and then use the straight edge and razor knife to cut the foam to as tight tolerances as you can. I always cut a bit bigger than I think I’ll need as I can always remove material to make it fit but can’t add it back if I make it too small.
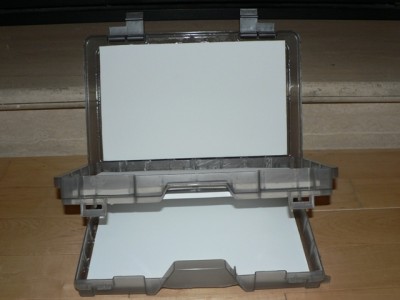
Once the Four foam pieces are cut to fit their corresponding surfaces, the final step is to use the spray on adhesive to secure each piece of foam in its place. Do yourself a favour and wear those rubber gloves for this step! Once in place, weight the top of the foam with whatever you have handy that fits and let stand until dry.
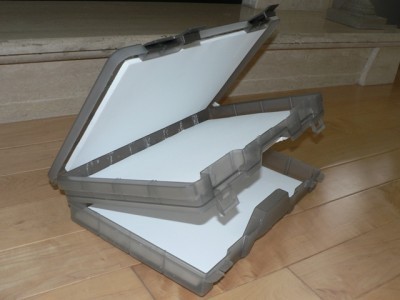
Fast forward an hour or so and voila … a low cost, light weight, compact and high density Double Decker DIY Fly Box!
That’s it folks … a custom built, reasonably sized & priced, double decker DIY fly box with a surface area of approximately 384 square inches! That’s a lot of fly real estate all for around $20.00! The only thing left to do now is get to the tying bench and fill it!
*** for more flyguys.net original fishing projects please hit up our complete projects list here!
[embedit snippet=”gas-matched-content-ti-ar”]
Like our stuff? Subscribe by ![]() Feed or
Feed or ![]() Email
Email .jpg)








Nice Rob! There’s always a place for a small box with all your say stoneflys or whatever,but I like the idea of a lake box that has everything in it. I know when I first started tying and I needed more boxes I glued foam into a bunch of video cassette cases and used them. They were cheap, floated and were uniform in size for storage. I’m thinking you could probably fit a couple thousand flies in that box of yours so get busy.
Thanks Gord!
Ya I’m real good at creating work for myself … lol … I started tying last night but I’ve got big plans and very little time so we’ll see just how much of that box actually gets filled up this year. 😉