Like most things in life, there are many different ways to skin a cat (or in this case to fillet a fish) and for the most part the method chosen is simply due to personal preference. The following is one of our favourite methods … a simple but comprehensive step by step approach to filleting fish!
* Although the method described is ours (and probably the same as many others) the actual pictures were sent to us without any crediting information. If anyone knows the originator please let us know so we can credit their work.
Step 1 – The Equipment:
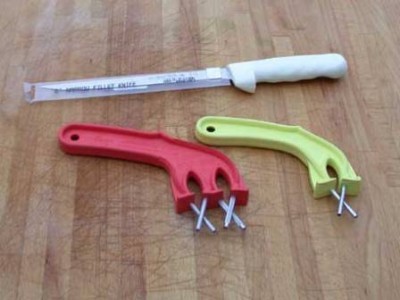
A sharp knife & a flat surface are all that is needed to successfully fillet a fish. There are many different fillet knifes on the market – don’t let them confuse you – anything around 8″ long, narrow and flexible; and something to keep it sharp will work just fine. A sturdy cutting board completes the list and you’re ready to go!
* Tip: Placing newspaper on the cutting board will reduce slippage and help soak up slime & keep things neat.
Step 2 – Cutting off the fillets:
Once you’ve got your knife sharpened & your workspace established it’s time to start filleting. We’re assuming you’ve already gutted your fish – if not please see our article on how to clean a fish now.
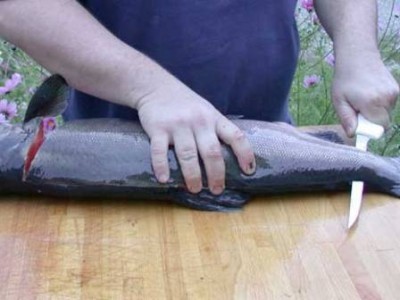
Make the first cut just behind the gill plate, in the first soft section of tissue. Make this cut straight down, perpendicular to the backbone. Cut all the way down to, but not through the backbone.
Once you’ve cut down to the backbone, make sure you cut and free the lower (belly) section. Then, while holding the knife against the backbone, turn it 90° so the cutting edge faces the tail and the blade is parallel to the backbone.
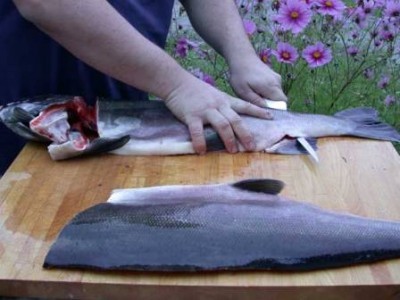
Then, while holding the belly flap up with one hand, start cutting towards the tail, with the blade parallel to the backbone, or angled just slightly towards the backbone, so it rides against it. You want to use the backbone as your guide.
In the other side, the tip of the blade should come as close to the dorsal fin as it can so you don’t leave a thick strip of meat on the carcass above the backbone … you want to keep as much meat as possible on the fillet!
As you cut towards the tail you will be cutting through the rib bones so it may take a bit of effort depending on the size of the fish. Keeping your knife sharp will really help with this step!
Continue working the blade along the backbone towards the tail. As you approach the anal fin, again concentrate on staying as close as possible to it as to leave as much meat as you can on the fillet.
Once you reach the tail of the fish, run your blade out along the backbone and then angle slightly upward and out through the skin. And there it is … your first fillet off the bone!
The procedure to get the second fillet off is exactly like the first except it’s a bit trickier holding the fish as you work the blade down the back bone. In this step it’s important to continue to hold the belly meat up as you cut along the backbone. Take your time and focus on angling the blade as to minimize the amount of meat you leave on the carcass.
After you pass the belly cavity, you can let go of the belly meat and, continuing to use the backbone as your guide, carefully angle the blade so that it rides just over the anal fin and out through the skin at the tail just like you did on the first fillet.
Step 3 – Ribbing the fillets:
Because we cut through the rib bones during the filleting process, we now need to remove the ribs.
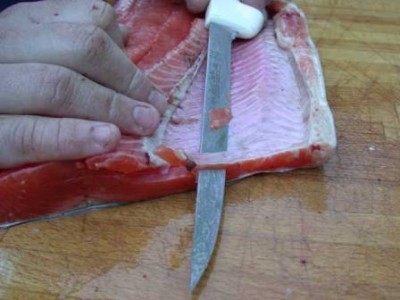
The first step in this process is to remove the first one or two ribs from the front of the fillet. These ribs are positioned slightly different than the rest of the ribs and if you don’t remove them first they will cause you nothing but problems when trying to remove the rest of the ribs. Simply remove them with an angled cut of the knife.
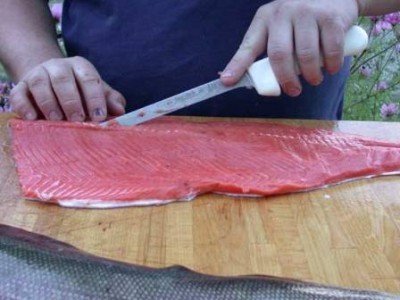
Now, starting near where the backbone used to be, cut just under the ribs. This takes a delicate touch …. you want to angle the knife so it’s angled slightly up towards the ribs and therefore maximizing the amount of meat you leave on the fillet (are you sensing a common theme yet 😉 ). You also want to put a little pressure downward on the knife lengthwise giving it a slight bend so it follows the ribs more closely – this is where a good fillet knife comes in handy!
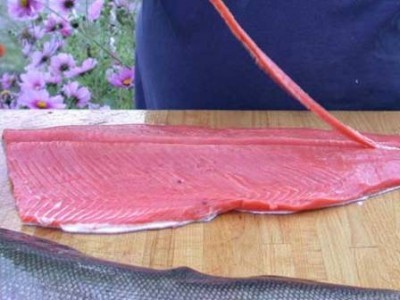
Continue to cut and lift the ribs out. You may leave a little bit of white belly lining in place, this is fine. You can either leave it (many people do) or trim it out later.
Now completely detach the ribs and belly lining and your done!
How much or how little you leave on or cut away is entirely up to you so take your time and keep working it until it meets your satisfaction.
Once you are happy with the fillet the next step is to trim out the backbone knuckles. These “knuckles” are actually little pieces of the backbone that were trimmed off when we cut the fillets off the fish. Removing them is a matter of preference so feel free to follow or skip this step as you desire. Removing them, however, makes the fillet look better as well as opens it up a bit more so that any sauces and spices that you may use in the cooking process will soak in better.
Start by straightening out your fillet so the backbone line is in a straight line and begin making a long “V” shaped cut with the bottom of the “V” just underneath the pieces of bone. Angle your knife at a 45° and carefully cut along both sides of the backbone line with the blade angled towards the center of the line and the tip of the blade about a 1/4″ deep. Cut all the way along the fish till you reach the tail.
Once done you should end up with a long triangle-shaped piece of scrap meat that has the pieces of bone on one side. It may be still be attached near the tail by a short white piece of gristle and if so simply pull up and trim it from the skin.
Step 4 – Removing the Pin Bones:
Just a warning that this step can be a real PITA! However, it’s very worth while to avoid getting fish bones in your mouth during what was supposed to be a nice fish dinner.
The first step in this procedure is to get your self a GOOD set of needle nose pliers or hemostats. The better the quality of this tool, the easier this PITA job will be for you. We use both and can’t say that one is better than the other as long as the quality is good!
Now … hold the fillet from underneath as to make the pin bones poke out a bit more and are easier to get at. Now grab a hold of a pin bone with your chosen weapon and pull. If it does not want to come straight out then just wiggle it a little bit to loosen it. it may also help to put two fingers from your other hand on the flesh on either side of the bone to hold the fillet down as you pull.
OK that’s one … now keep on pulling till you get them all!
Step 5 – Trimming:
Now that the ribs have been removed, we simply need to do a little delicate “finish” work to make the fillets look really presentable. Much of this is a matter of personal preference, some people don’t do much trimming at all and others go hog-wild … feel free to improvise and do what you think is practical.
The first thing we do is remove the ventral fins. Some people like to remove only the fin, while others prefer to remove a bit of belly meat and fat along with it. Regardless, the easiest way to do this is to poke the knife blade through the fillet just above and forward of the fin from the inside and then cut off whatever you desire while working your way down towards the end of the fish fillet.
Step 6 – You’re done:
That’s it folks … once you get to the point where the fillets look good to you then you’re done!
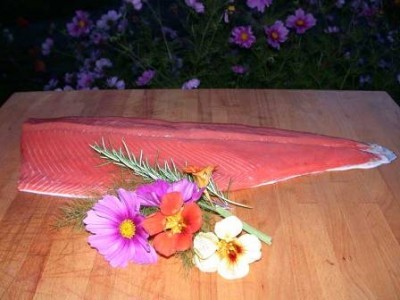
That’s it! The finished fillet is now ready for the grill or oven!
We hope that this has been helpful and if you need some recipes for your masterpiece just visit our recipes page for some great cooking ideas!
Like our stuff? Subscribe by ![]() Feed or
Feed or ![]() Email
Email .jpg)

