[embedit snippet=”gas-auto-responsive-link-ad-minimalist”]
DIY European Deer Skull Mount …
Well it seems that the European Deer Skull Mount is all the rage in all the hunting circles these days. And why not? They look great and they are much less expensive than a conventional mount! And … if you are willing to put in a bit of elbow grease it’s something that you can do yourself! 🙂
Now before we get too far into it we should let you know that this is definitely not for everyone. And although we think the method we are about to describe is fairly clean & easy, if you’re not sure you can handle dealing with brains and eyeballs and inner ears (oh my 😮 ) , and/or if graphic pictures make you squeamish, then perhaps you should stop right here and let a professional do it for you. On the other hand, if you think you’re up the the challenge then a “do it yourself” (DIY) Euro mount of your trophy is a great way to cap off a successful hunt and capture the memory forever!
Disclaimer: The method we are about to describe is by no means “our” method. It is a mish mash of many different methods thrown together after an extensive search on the topic through various means. Are there better ways to do this? Maybe. But this is what we settled on and it turned out great for us so we have decided to share it with all of you. Please feel free to share any thoughts, ideas and suggestions in the comment section at the end of the post!
OK, for those of you still reading let’s start off with a list of necessary supplies …….
DIY European Deer Skull Mount | Materials List …
- A Large heavy-duty pot (big enough to hold your trophy’s skull)
- A heating element (Preferably something that can be used outside)
- Dish soap (we used Sunlight)
- A Knife
- A flat head screwdriver
- A nylon brush
- A large non metallic container (a cardboard box will do)
- Black electrical tape
- A small paint brush
- Rubber gloves / Safety glasses
- 40% peroxide solution
- Saran Wrap
- A Wooden Plaque
- One 1/8 x 3 inch drywall anchor
- A Drill
DIY European Deer Skull Mount | Instructions …
Acquire your Trophy:
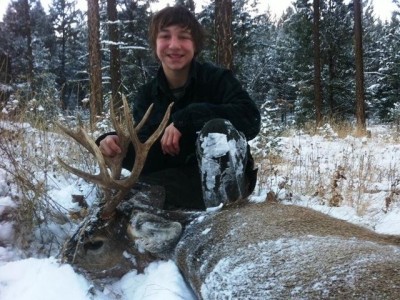
What you consider a “trophy” and how you acquire it is up to you. We used this nice little 4 point Mule deer buck for our first attempt.
Skin the Skull:
Time to get down and dirty and skin out the head. You can skin out as much or as little of it as you like but keep in mind that the more you do now, the quicker and cleaner the boiling process and the better the final product.
We didn’t go overly krazy but we did remove all the hair that we could as well as the lower jaw, and as much meat as possible. We also removed the ear bones – a little hard to explain but you’ll see what we mean once you get into it.
*TIP: a flat head screwdriver helps dislodge hair from under antler burrs and to pry hair away from the skull. It is also useful for prying out the lower jaw and the ear bones out.
Cook the Skull:
Fill your large pot with enough water to cover the skull and get it all heated up on the boiler. During the process some of the water will evaporate so you will need to keep your eye on things and add water as needed.
The water should be simmering not boiling – boiling may weaken bones.
Let it cook for 30 or so minutes and then remove skull and start scraping off tissue using your knife and/or brush. The longer the cooking the easier the tissue will come off. This task will require a little effort.
Put the skull back in the pot and let it cook some more. You can expect to repeat this process 3 or 4 times before all the meat and “stuff” has been removed from the skull.
During the final simmer we added a bit of sunlight dish soap to the water to get the “greasies” off the bone.
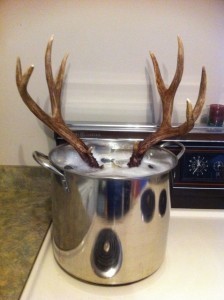
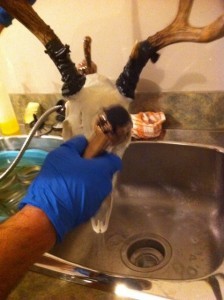
* TIP: If at all possible DO THIS OUTSIDE! It’s not so much the smell, at least not if the skull is fresh, but the process of pulling the skull in and out of the water while scraping and cutting chunks of meat off of it can be quite messy. The picture above shows our deer skull cooking inside on the stove top but that was just for the last cook – the majority of the cooking was done outside with a propane burner! 😉
* Tip #2: If the antlers get too wet during this process they can soften so you may want to protect them by wrapping them with plastic and securing it with tape (as we do before whitening) BEFORE the cooking process. Thanks for the tip JW! 🙂
Pressure Wash the Skull:
Now although you might have been able to get the skull fairly clean during the simmering process, we strongly recommend pressure washing afterwords!
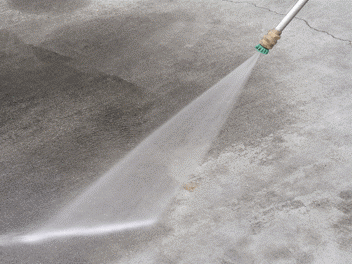
Pressure washing the skull at this point ensures that all the itty bitty chunks of meat, brain, eyeballs, sinew (and whatever else is in there) are completely removed from the skull. It’s especially useful for removing what’s left of the brains from the center of the skull. Failure to follow this step may result in a very stinky skull within a few months. Not a good idea – especially if you want your significant other to ever agree to letting you attempt this again! 😉
* TIP: If you don’t have a pressure washer no problem – just do what we did and go spend a loonie at your nearest do it your self car wash – the bonus is that you don’t even have to clean up after yourself! 😉
* Another TIP: Be careful with the pressure washer as it is very easy to blow off the nose bones (which I did 🙁 ). If they do come off it’s not the end of the world – just gather them up and super glue them back on once the skull is dry (which I didn’t … but you should! )
Whiten the Skull:
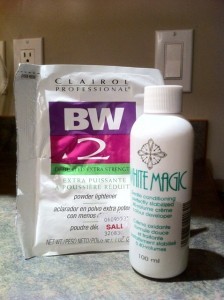
Once the now clean skull has had time to dry, place it in a container (we used a cardboard box lined with Saran wrap) and break out the 40 Volume “developer” – AKA peroxide. When you purchase this stuff there is a liquid form and a cream form – for ease of use be sure to ask for the cream.
Start by taking the black electrical tape and tape up the bases of the antlers to prevent whitening where you don’t want to be whitening.
Now put on your rubber gloves and safety glasses and, using your small paint brush, begin painting and completely cover the skull with the peroxide cream. Don’t forget the backside, underneath and the teeth. Be careful – 40% peroxide is very strong and will burn you if it comes in contact with your skin or eyes so please be sure to wear the gloves and glasses!
* Yet another TIP: Although you can just use the 40 Volume developer cream, we also threw in a package of extra strength powder lightener as recommended by the sales lady in the beauty supply store – not sure if it made a difference or not but we’re very happy with the way it turned out!
[embedit snippet=”gas-auto-responsive-link-ad-minimalist”]
Once completely covered with the peroxide we wrapped the whole thing up in Saran Wrap and placed it under a lamp for a couple of hours.
Rinse & Dry the Skull:
Fast forward a couple of hours and it’s time to unwrap and rinse off your project. For safety you should once again use rubber gloves and safety glasses during this step – 40% peroxide is very strong and will burn you if it comes in contact with your skin or eyes!
Now if you did a good job cleaning the skull and got the peroxide into all the nooks and crannies it should be much whiter than when you started. If not you can always reapply more peroxide and re do this step but I think you will find that one good treatment is adequate to get it nice and white!
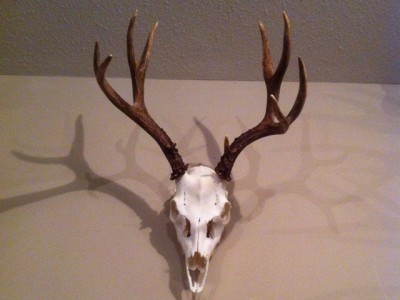
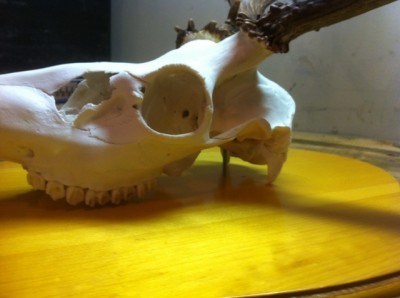
If all is well at this point you can remove the black electrical tape from the antler bases and sit the whole thing somewhere to dry overnight. Here’s what ours looked like at this point:
Congratulations! If you’ve made it this far you are done with the skull and simply need to decide how to mount it! 😀
[embedit snippet=”gas-auto-responsive-link-ad-minimalist”]
DIY European Deer Skull Mount | Mounting Options …
Well there’s probably a hundred different to mount the skull but from what we’ve seen the most comm0n is to secure it to a plaque and hang it on the wall so for simplicities sake that’s what we are going to describe.
As far as the plaque goes my father just happened to have one laying around in his garage. If you have a pack rat for a father like me then maybe you’ll get lucky too 😀 but if not I have heard that hobby stores like Micheal’s and the like may carry them.
For the actual mounting, we decided on a single 1/8 inch drywall anchor through the back of the plaque and into the thick base bone on the underside of the skull. We found that a three inch drywall anchor was the perfect length for the application.
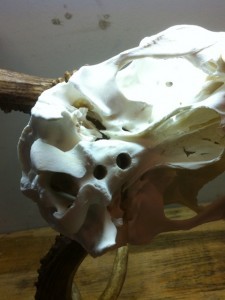
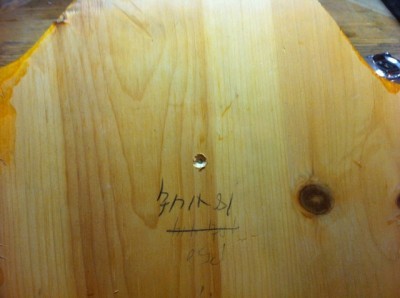
You will need to drill a hole in the base of the skull big enough to allow the anchor to slip through.
* Disregard the two holes in the picture – you only need one large enough to allow the head of the drywall anchor to fit through.
Don’t worry about drilling in this location as it is a very thick and strong part of the skull!
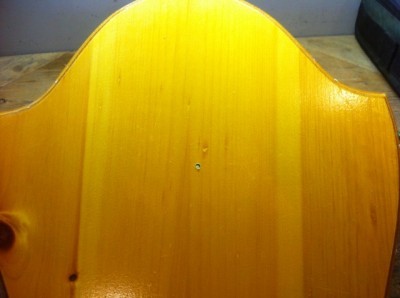
Next you will need to drill a small hole through the plaque where you want the anchor to hold the skull. Be sure to place the skull on the plaque and see where it looks best and then carefully mark the spot where you will drill the hole.
Now flip the plaque over and counter sink a bit of the back side of the hole to fit the anchor screw head – so the plaque can sit flat against the wall.
Now all you need to do is slip the anchor into place on the plaque and fit the skull down onto it making sure the anchor goes through the hole in the skull that you drilled earlier. Once in simply tighten up the screw from the back side of the plaque and the skull will begin to press down tight against the front of the plaque. Tighten just to the point where everything is solid – do not over tighten!
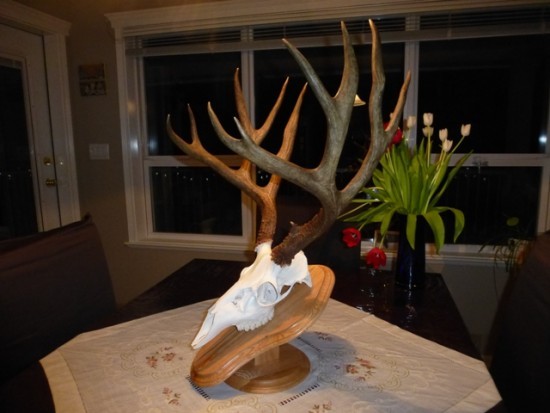
OK folks that’s it – you’re done! 😀 Stand it up and admire your hard work!
If you are planning to hang it on the wall you will simply need to drill a hole at the top center of the plaque to allow for a screw to secure the whole thing to the wall.
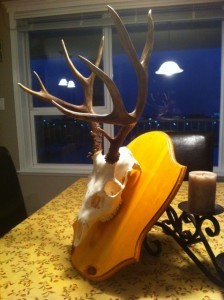
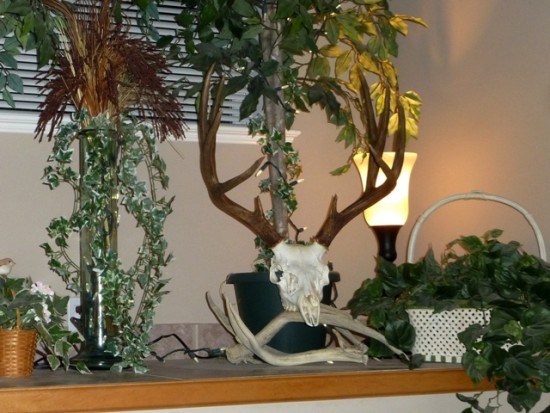
Another option is to sit it on an angle (like in the picture on the right) on an end table or coffee table.
Or I guess you could do a bit more work and build a wedge to allow it to mount on the wall at an angle!
Hmmm, like I said before, the options are pretty much endless but we’re sure you’ll figure out the placement that works best for you!
DIY European Deer Skull Mount | More Examples …
Well we hope you’ve found our DIY Low Cost European Deer Mount post helpful, or at the very least interesting. If you have any further questions please feel free to contact us through our email or simply leave a comment below and we will get back to you ASAP. Thanks for reading and tight lines and straight shooting to you all!
[embedit snippet=”gas-matched-content-ti-ar”]
Like our stuff? Subscribe by ![]() Feed or
Feed or ![]() Email
Email .jpg)












thanks for the read, i have a elk skull cap that i want to mount on my own… i bought a kit from cabella’s but it has the worst imaginable directions included. they included screws, the plaque and a cover. i am trying to figure out what to do with screws and the wood plaque.
– do i drill screws thru the cap and in to the wood – hopefully securing the antlers to the plaque?
– do i drill through the wood and then into the anters?
– do i use screws at all?
aughghghg. help.
Kevin
Kevin it sounds like the kit you bought is not for a euro mount. I’m not sure but from your description it sounds like you would use the screws to mount the antlers to the plaque (screws through the skull plate into the plaque) and then place the cover over top of the skull section to cover it and the screws. Hope that helps …..
Hi I was just wondering where you can buy the white magic cream?
Try the beauty section of any drug store (London Drugs, Shoppers, etc) 😉
I recommend wrapping the antlers before you start the “boiling “ process and any other water treatment. Antlers are made of the same material as finger nails and to much exposure to water can soften them. If you haven’t done a European mount before it can be an easy mistake to get the antlers too wet. Saran Wrap and the put electrical tape around them to protect them from water.
Great tip Jerry thank you! I will edit the post to include it! 🙂