[embedit snippet=”gas-ar-td-minimalist”]
Mr. Rainbow’s Foam Dragon
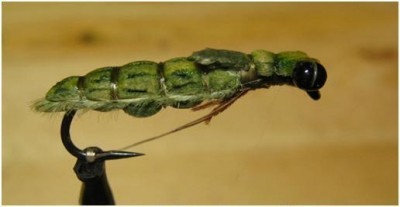
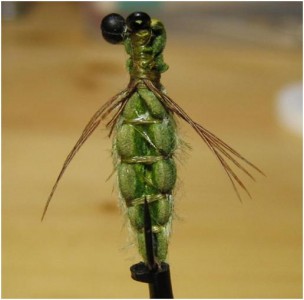
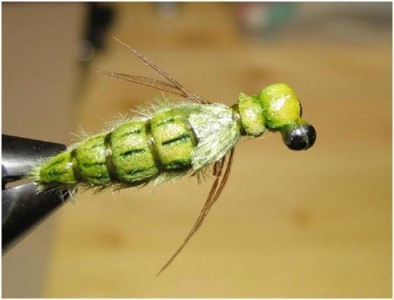
Floating Dragonfly Nymph Fly Pattern
Well as far as floating dragonfly nymph patterns go we don’t think you can beat Mr. Rainbow’s Foam Dragon Fly! This is a great pattern to crawl right along the lake bottom at any time but is especially productive when the dragons are migrating to shore to hatch.
Mr. Rainbow’s Foam Dragon | Tying Instructions:
Take some closed cell foam in your choice of color and cut two equal squares about 4 inches wide and long. The bigger the patch the more bodies you can make.
Glue the two squares together using a super glue gel, I use Loctite super glue gel.
Squeeze the two squares together nice and tight to spread the glue to all the surface areas. Let the glue dry. The two layers of foam with a glue center gives you a body that will not collapse around the hook when tying it in.
Next draw your desired body shape on the foam and cut them out. You are making the rear portion of the dragon which will make up about 2/3rd’s of the fly. It will have a blunt end that goes under the wing case and a pointy end for the rear. I use a size 6 black salmon hook and make the bodies so they hang off the back off the hook slightly and come to the 2/3rd’s point of the front of the shank. Draw a few different bodies until you find one that works for you.
Now cut out the bodies and then take you scissors on a 45 degree angle from the body and trim the edges of the body to give a rounded look to the top of the body. You are just trimming the sharp edges of the foam off.
At this point I color the body with a prismacolor pen and then wipe off the excess with my fingers to achieve the shade I want.
Mount your hook in the vice and cover the shank with olive thread. Leave your thread at the back of the hook.
Take your premade body and cut a slice down the bottom of the body lengthwise. Apply some super glue to the hook shank and place the body onto the hook with the shank going into the slit in the body.
Now take your thread and make a few wraps just above the end of the body to create your fist segment.
Now move your thread up the fly a few millimeters on the bottom of the fly and start another segment. Continue until you reach the front of the body. If you have made the body a little too long you can always pinch some of it down under the thread.
Next tie in your legs on each side with the material of your choice.
Take a section of weed eater line and hold it in some forceps or needle nose pliers. Squeeze it as hard as you can to create a flat spot in the line. While still holding the line in the pliers burn each end to make the eye’s.
Now take a single layer of closed cell foam and cut it into a strip about an inch or two long and just slightly wider than the width between your two eye’s. Color the strip with the same method mentioned earlier. Tie the strip onto the top of the shank just ahead of the body and tie it in tight all the way up to the hook eye compressing the foam tightly. Now tie in your eye’s just below the eye of the hook.
[embedit snippet=”gas-auto-responsive-link-ad-minimalist”]
Take the strip of foam and pull it back over the eye’s and tie it back down with a couple of wraps.
Add one more set of wraps farther back and complete it with the thread in front of the body.
Next take a small section of raffia or Swiss straw in the appropriate color and make your wing case. I like to tie in the straw facing forward and leave a small tag amount below the thread.
Now is the time to whip finish your thread and cut it off.
Now fold the straw back over the thread and secure the straw to the tag end with a small drop of super glue gel.
Trim the straw to a wing case shape and your done!
If you want to make the fly more durable cover all the threads on the bottom with soft body or a similar.
[embedit snippet=”gas-auto-responsive-link-ad-minimalist”]
It sounds complicated but it’s not a difficult or lengthy fly to tie once you have done a few. When you make one that you are really happy with save as template for you next one’s. It will give you a good idea of proportions and length’s of the two sections.
There you have it folks … Mr. Rainbow’s Foam Dragon Fly!
*** if you’re interested in custom tied, time tested & proven effective BC Interior fly patterns, but would rather buy than tie, please Contact us for details!
*** for more effective BC stillwater fly fishing patterns be sure to check out all of flies on our BCs best fly patterns index page!
[embedit snippet=”gas-matched-content-ti-ar”]
Like our stuff? Subscribe by ![]() Feed or
Feed or ![]() Email
Email .jpg)


