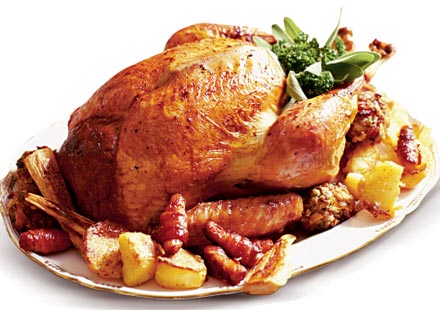
Brined & Roasted Turkey Recipe
Just in time for the holidays! 😀
Brining is a centuries old trick that all the pros use. Best of all it’s very simple and it really works. Brining encourages the tightly wound proteins in meat to uncoil, bump into each other and form a web of sorts that sets with the heat of the oven and traps moisture. Just in time for the holidays you really need to try this brined roasted turkey recipe for the best tasting, juiciest turkey ever! Here’s what to do:
Brined & Roasted Turkey Recipe | What you need:
You will need an accurate meat thermometer to gauge exactly when the meat is done. Don’t rely on the pop-up thermometers; they are calibrated so high that they guarantee dried out meat!
For a standard 12 to 25 pound turkey you will need 2 pounds of salt, ideally sea salt and 2 cups of brown sugar. You will also need a clean picnic cooler large enough to hold the turkey when completely submerged in water.
Brined & Roasted Turkey Recipe | What you do:
Place the turkey, salt and sugar in the bucket.
Cover with 4 gallons of cold water and submerge the turkey upside down.
Turn the turkey a few times to mix the salt and sugar.
Place the bucket in a cold place for four hours for a smaller turkey and as much as six hours for a larger one, no more no less.
If necessary to keep the brine cold replace some of the water with a few bags of ice or even throw in some freezer packs.
Remove the turkey from the brine and rinse well under cold running water.
Let rest uncovered overnight in the refrigerator. This will drain any excess moisture and help dry out the skin so it will brown better.
Rub the turkey with butter, ground pepper and your favourite herb or spice mix.
Stuff the turkey with fresh herb sprigs, garlic cloves and large chopped pieces of carrot, celery and onion.
Place breast side down on a clean well oiled roasting rack in a roasting pan. Add two cups of water to the pan.
Place the turkey in a preheated 400° oven. Roast one hour then, without opening the oven, turn the heat down to 250° and continue roasting for two hours longer. (for a 20 to 25 lb. turkey or larger roast for three more hours – if you have a convection oven only roast for 45 minutes first before turning down the oven heat – no other adjustments are needed).
Flip the turkey breast side up and baste it thoroughly. Add two cups of water to the roasting pan. Turn the oven back up to 400° and continue roasting until the breast meat is exactly 165° and the thigh reads 170°. (Baste and check the temperature every 15 minutes or so – this finishing heat will help brown the skin).
Let the turkey rest covered with foil for 20 to 30 minutes before carving then serve immediately.
That’s it … be prepared for the best tasting turkey ever!
Enjoy …….Susan
*** got a fish or wild game recipe that you would like to share on flyguys.net? Just email us the details and we’ll post it up for you!
*** for more delicious and organic BC wild fish & game recipes please view the complete list on our recipes index page!
Like our stuff? Subscribe by ![]() Feed or
Feed or ![]() Email
Email .jpg)


